
21st Sep 2026
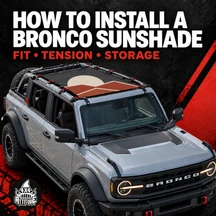
How to Install a Ford Bronco Sunshade: Fitment, Tension, and Storage
Get the Fit Right Before Taking the Roof Off
A mesh sunshade can make an open-air Bronco more comfortable by adding overhead shade while allowing airflow. A good installation starts before you attach the first bungee. The shade must match your Bronco’s body style, and you need the instructions for that specific product.
4x4 Attitude lists separate collections for Bronco 2-door sunshades and Bronco 4-door sunshades. Choose the correct one, read its fitment restrictions, and lay out the kit before removing roof panels. A mesh shade adds comfort, but it doesn’t replace the factory roof when you need weather protection.
Confirm Your Bronco’s Body Style and Product Fitment
First, confirm that you have a full-size Bronco rather than a Bronco Sport. Then check whether it’s a 2-door or 4-door model. The roof openings differ, so a shade designed for one body style shouldn’t be stretched to fit the other.
Read the individual product listing for model restrictions, too. For example, 4x4 Attitude’s custom 4-door Bronco sunshade lists 2021–present 4-door models and excludes the Raptor. If you have a Raptor, an aftermarket roof, or an unusual setup, confirm compatibility before ordering or installing.
Lay Out the Shade and Included Hardware
Find the mesh panel, included bungee cords, and product instructions. Give yourself room to identify the front, rear, and sides of the shade. Check that the mesh and cords have no damage or twists before installation.
4x4 Attitude says its Bronco mesh shades install without special tools or vehicle modifications. The installation kit includes bungee cords and instructions. You can also watch its 4-door Bronco sunshade installation video before you begin. Follow the directions for your shade if they differ from general tips in this article.
Prepare the Roof Opening
Park safely and choose a clean, dry work area. If you’re removing factory roof panels, follow the instructions for your Bronco’s model year and roof type. Put the removed components in a protected location as directed by Ford.
Check the roof opening for mud, grit, or sharp objects that could rub against the mesh. Look for accessories or aftermarket parts that might interfere with a cord or attachment point. Lay the shade over the opening without fastening it to confirm its orientation and coverage.
Attach the Shade Using Its Product Instructions
Use the included diagram or video to identify the correct attachment points and route each bungee. Keep the panel centered as you work. Connect the points in the order the product instructions specify, and check that no cord is twisted or caught against trim.
Don’t pull a corner into place if its attachment point doesn’t line up. Stop and check the shade’s orientation, your Bronco’s body style, and any accessory in the way. Forcing a cord can stress the mesh or leave the shade crooked.
Check the Fit and Tension Before Driving
Walk around the Bronco once every attachment is in place. The shade should sit evenly over its intended opening. Look for loose sections, twisted cords, uneven edges, or contact with a sharp surface.
Adjust the attachments according to the supplied instructions. The goal is a secure, even fit, not the tightest stretch you can achieve. Check the shade again after your first short drive. If it shifts, flaps excessively, or rubs against another part, stop and correct the installation.
Keep 2-Door and 4-Door Coverage Separate
A 2-door Bronco has a shorter cabin and a different shade application from a 4-door. Use the 2-door collection or 4-door collection that matches your vehicle. Check the exact product description rather than relying on a photo of a similar Bronco.
A shade may work with a particular hard-top or soft-top configuration, but installation can depend on the roof arrangement and accessories present. Confirm those details on the product page or with 4x4 Attitude when your setup differs from stock.
Follow Ford’s Roof Instructions Separately
Removing and reinstalling factory roof parts is a separate job from attaching the sunshade. Follow your Bronco owner’s manual for the correct handling, order, and storage of roof components. Don’t use a sunshade to hold a roof panel in place or change how Ford directs you to secure it.
Mesh allows air through, and rain can pass through it, too. Keep your factory roof available when the weather calls for a sealed cabin. The shade is intended for open-air comfort, not waterproof coverage.
Remove and Store the Shade With Care
When it’s time to remove the sunshade, release its attachments as directed instead of pulling the mesh loose from one corner. Inspect the bungees and edges while you work. Clean away dirt using the product’s care instructions, and let the shade dry before storage.
Store it away from sharp cargo and excessive heat. Check the cords and mesh before your next trip so you can address damage before reinstalling it. If the shade still doesn’t fit after checking orientation and fitment, contact 4x4 Attitude rather than trimming the panel or changing the Bronco.
Enjoy Open-Air Driving With a Secure Fit
Installing a Ford Bronco sunshade starts with the right product. Match the full-size Bronco’s 2-door or 4-door body style, check exclusions, and follow the instructions included with your shade. Finish by inspecting its alignment and attachments before driving.
Ready for more shade on your next top-off drive? Browse 4x4 Attitude’s 2-door Bronco sunshades or 4-door Bronco sunshades, choose the fit for your vehicle, and use the matching instructions for installation.