
23rd Sep 2026
Ford Bronco Action Shield Care: How to Clean, Remove, and Store It
Why Action Shield Care Matters After a Trail Day
A Ford Bronco can pick up mud, dust, road salt, and fine grit during a single drive. Action Shield™ body armor helps protect the paint from everyday scratches and trail contact, but the removable panels need care, too. Dirt along an edge or grit on the adhesive side can interfere with a clean reinstall.
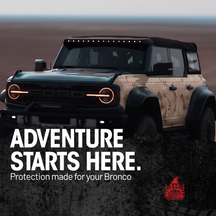
4x4 Attitude describes its Bronco 4-door Action Shield body armor as nonmagnetic, washable, and reusable. A simple routine will help you carefully remove the panels, clean them, and store them flat until the next trip.
Know What Your Bronco Action Shield Protects
Action Shield is designed to protect your Bronco’s paint and finish. It isn’t a rock slider or a structural body panel, and it won’t prevent every dent or impact. Its reusable adhesive helps the panels stay in place when they’re installed on a clean surface with a flush bond.
Fitment matters before you install or reinstall a set. For example, the Retro Action Shield for the Ford Bronco 4-door lists 2021–present 4-door models and excludes the Bronco Raptor. Check your specific product page and the Action Shield installation and maintenance instructions before you begin.
Clean the Bronco and Panels Before Removal
Start by removing loose dirt and mud from the vehicle, especially around panel edges. Grit can scratch the paint if it gets dragged across the surface during removal. Let the Bronco dry, then work at room temperature, away from direct sunlight and hot body panels.
Keep the supplied corrugated storage boards close by. You’ll need a clean place to put each panel as it comes off. If mud is packed along an edge, clean that area first instead of pulling the panel through the debris.
How to Remove Action Shield Panels
4x4 Attitude recommends a slow, diagonal removal. Pulling hard from one corner can damage a panel, so take your time with each piece:
- Carefully peel back one top corner.
- Pull slowly downward and diagonally toward the opposite bottom corner. Stop about halfway.
- While holding the released section, carefully peel back the other top corner.
- Continue pulling diagonally and downward until the panel comes free.
- Place the removed panel on its corrugated storage board.
If a panel catches on a badge, trim piece, or built-up dirt, pause and check the area. Don’t yank it free. You can review the full removal sequence in 4x4 Attitude’s instructions.
Wash a Dirty Adhesive Side Gently
If the adhesive side gets dirty, 4x4 Attitude recommends cleaning it with water, dish soap, and a gentle, soft sponge. Rinse away the soap and check for remaining sand or debris. Avoid stiff brushes or harsh cleaners that could damage the panel.
Gently clean mud from the outer surface, too. Keep dirty wash tools away from the adhesive side to avoid transferring grit back onto it. If you notice a tear or other damage, contact 4x4 Attitude for guidance before reinstalling the panel.
Let Every Panel Dry Completely
Action Shield must be completely dry before storage or reapplication. Give the cleaned panels time to air dry in a clean, dry location. Don’t stack wet panels together or put them back on the Bronco while moisture remains on the adhesive side.
If you’re cleaning your set before a trip, plan for drying time. A clean, dry panel is easier to inspect and prepare for installation.
Store the Panels Flat on Their Boards
The corrugated boards supplied with the kit are for storage. Return the dry panels to the boards and keep them in a dry place. Avoid extreme temperatures and direct sunlight, and keep sharp tools or loose cargo away from the panels.
Never fold Action Shield panels. According to 4x4 Attitude, folding can damage them and make it harder for them to adhere properly later. If your kit contains several pieces, a quick photo of the layout can help you organize them for the next installation.
Prepare for a Clean Reinstall
Before reinstalling, make sure both the Bronco and the panels are clean and completely dry. The vehicle surface should be free of dirt, oil, and wax. Work at room temperature and avoid direct sunlight or hot paint.
Align each panel with its intended body area, make small adjustments as needed, and press out air pockets. Finish by pressing firmly around the edges. Full, flush adhesion helps prevent wind and dirt from getting underneath and weakening the bond. Follow the installation diagrams and instructions for your set.
Take Extra Care With Pressure Washing, Cold Weather, and Modifications
You can wash your Bronco while Action Shield is installed, but avoid directing a pressure washer spray at an angle that forces water under a panel. Check the edges afterward and address any lifting before your next drive.
4x4 Attitude also advises caution around extreme temperatures and direct sunlight during installation and removal. Its care guidance recommends removing the panels during extreme cold, particularly when road salt is used. If aftermarket badges or body parts affect alignment, contact 4x4 Attitude before trimming a panel. Customer modifications can damage it.
Keep Your Action Shield Ready for the Next Drive
Good Ford Bronco Action Shield care follows a straightforward sequence: clean the vehicle, remove each panel slowly, gently wash dirty adhesive, let everything dry, and store the panels flat on their boards. When you’re ready to reinstall, start with clean surfaces and press every edge into a flush bond.
Looking for reusable protection for your Bronco’s finish? Explore 4x4 Attitude’s Bronco 4-door Action Shield collection, confirm the fitment on your chosen product page, and keep the care instructions handy for every removal and reinstall.