Action Shield Body Armor Tips & Tricks
How to Prepare for Installing Action Shield Body Armor
Installation is simple and does not need any experience or tools. Make sure that both the Action Shield Body Armor and your vehicle are clean, dry, and free of dirt, oil, and wax. Avoid direct sunlight or hot vehicle surfaces when applying or removing Action Shield Body Armor. Installation and removal should be done at room temperature only. Standard installation should take less than 30 minutes and can be completed within 5-10 minutes with practice. For the best install make sure hands are clean and dry.
How to Install Action Shield Body Armor
-Lay out the corrugated boards that the Action Shield Body Armor is currently installed upon.
***Keep these corrugated boards to easily store Action Shield Body Armor when you desire.***
-Begin by pulling one panel from the corrugated board and holding by the two top corners.
-Align the top section of the Action Shield Body Armor panel to the corresponding vehicle surface area and simply press in position with the palm of your hand.
-Gently pull back and adjust as needed for perfectly flush and flat adhesion, pressing out air pockets.
-Finish by pressing firmly all around the edges for a perfect fit.
-Action Shield Body Armor panels may need slight adjustments to align fluidly.
NOTE: Action Shield Body Armor is made to fit standard Jeep models, such as JK 2-Door, JK 4-Door, JL 2-Door, JL 4-Door, and JT Gladiator and can be modified to fit with a hobby razor, knife, or scissors to conform with aftermarket vehicle modifications or badges.
***WE ARE NOT RESPONSIBLE FOR DAMAGE TO ACTION SHIELD BODY ARMOR DUE TO CUSTOMER MODIFICATIONS. REPLACEMENT PANELS CAN BE PURCHASED IF NEEDED***
How to Remove Action Shield Body Armor
-Slowly and carefully peel back the top corner of the Action Shield panel.
-Slowly and steadily pull the panel diagonally and downwards towards the opposite bottom corner, stopping halfway.
-While still holding onto the first corner, carefully peel back the opposing top corner that is still attached and slowly pull diagonally and downwards towards the opposite bottom corner until the panel is free.
***TO AVOID DAMAGE, DO NOT QUICKLY PULL ACTION SHIELD AGGRESSIVELY OR REMOVE BY ONLY HOLDING ONE CORNER***
-Place panels back onto Action Shield corrugated board.
Action Shield Body Armor Maintenance & Tips
- It is important to have the entire Action Shield adhere in all areas to avoid wind and dirt intrusion, which can weaken the bond. Failure to install Action Shield Body Armor with a flush, uninterrupted bond may result in a lost or damaged panel.
- If the Action Shield adhesive side becomes dirty, simply use water, dish soap, and gentle soft sponge to clean.
- Ensure that the Action Shield Body Armor is totally dry before storage or re-application to the vehicle.
- If a pressure hose is used to clean a vehicle while Action Shield is installed, avoid water spray at angles that may force water between Action Shield and vehicle surface.
- When not using Action Shield, utilize the corrugated boards and store in a dry location. Avoid extreme temperatures and direct sunlight when removing and installing your Action Shield. ***DO NOT*** fold Action Shield Body Armor panels as it may result in damage to panels and hinder ability to adhere to vehicle surfaces.
- Your Action Shield's expected lifespan may be compromised by environmental factors including, but not limited to, extreme cold temperatures and road salt exposure. We recommended removing Action Shield during extreme cold conditions.
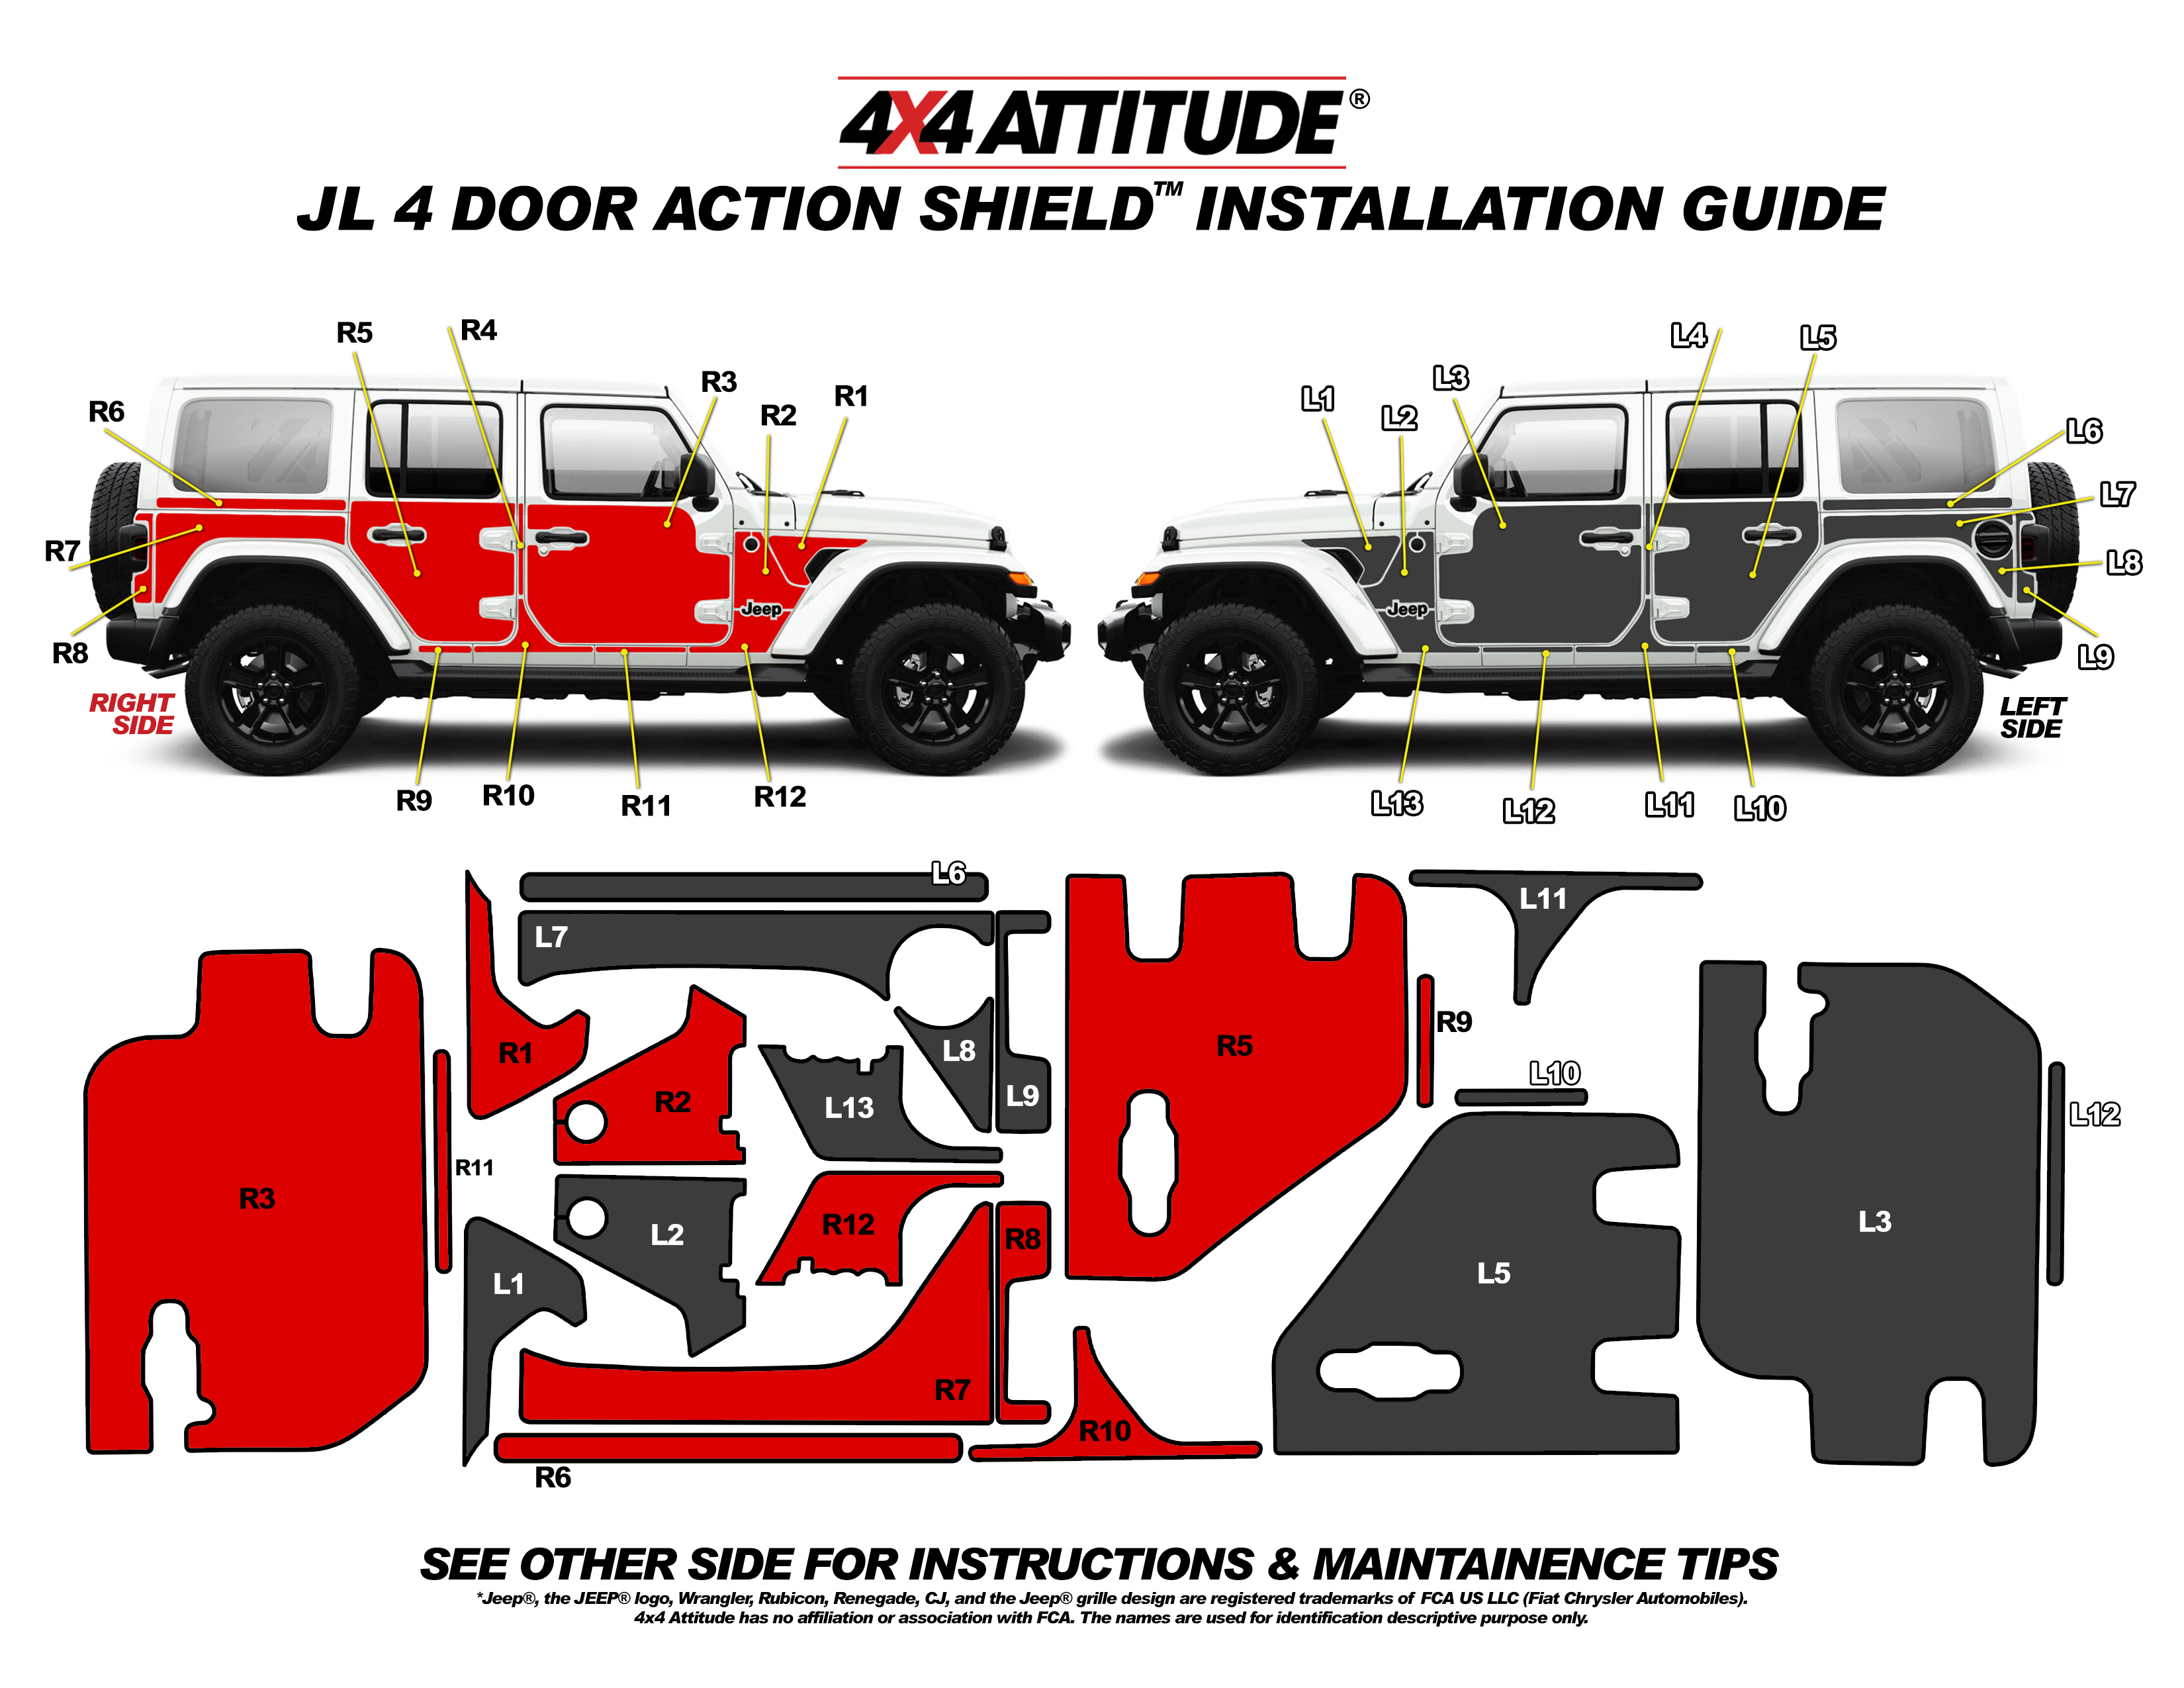
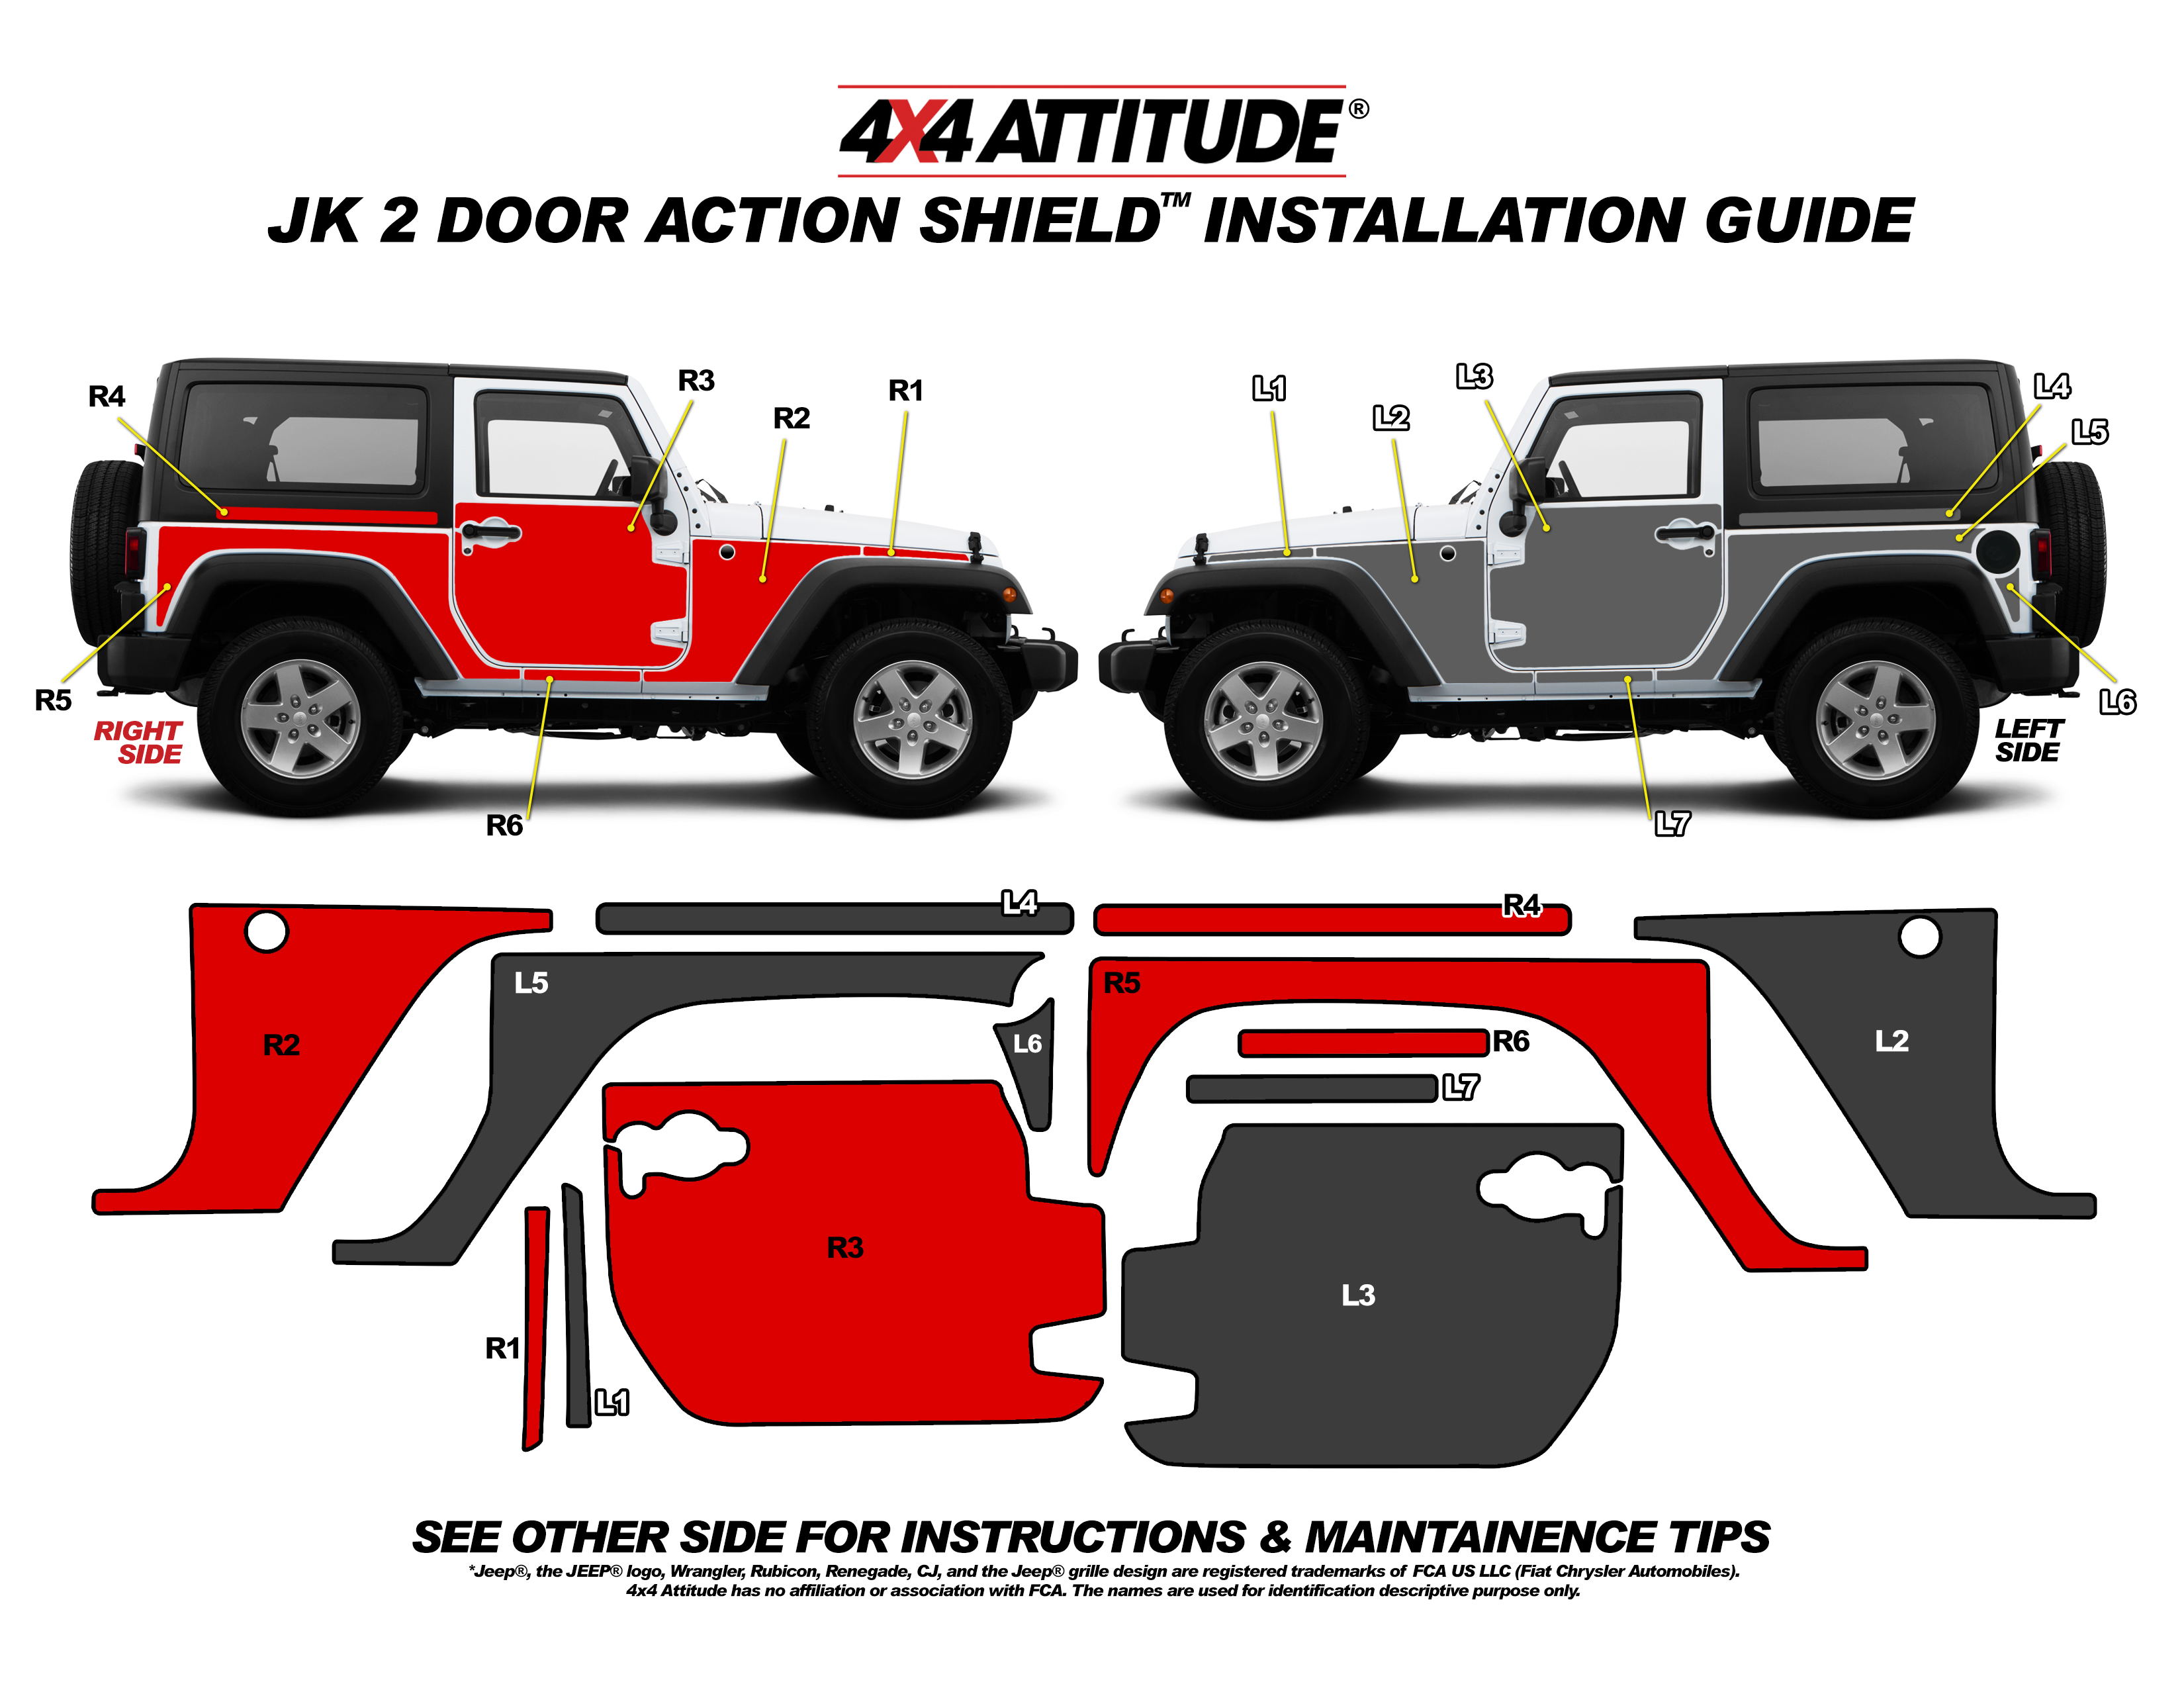
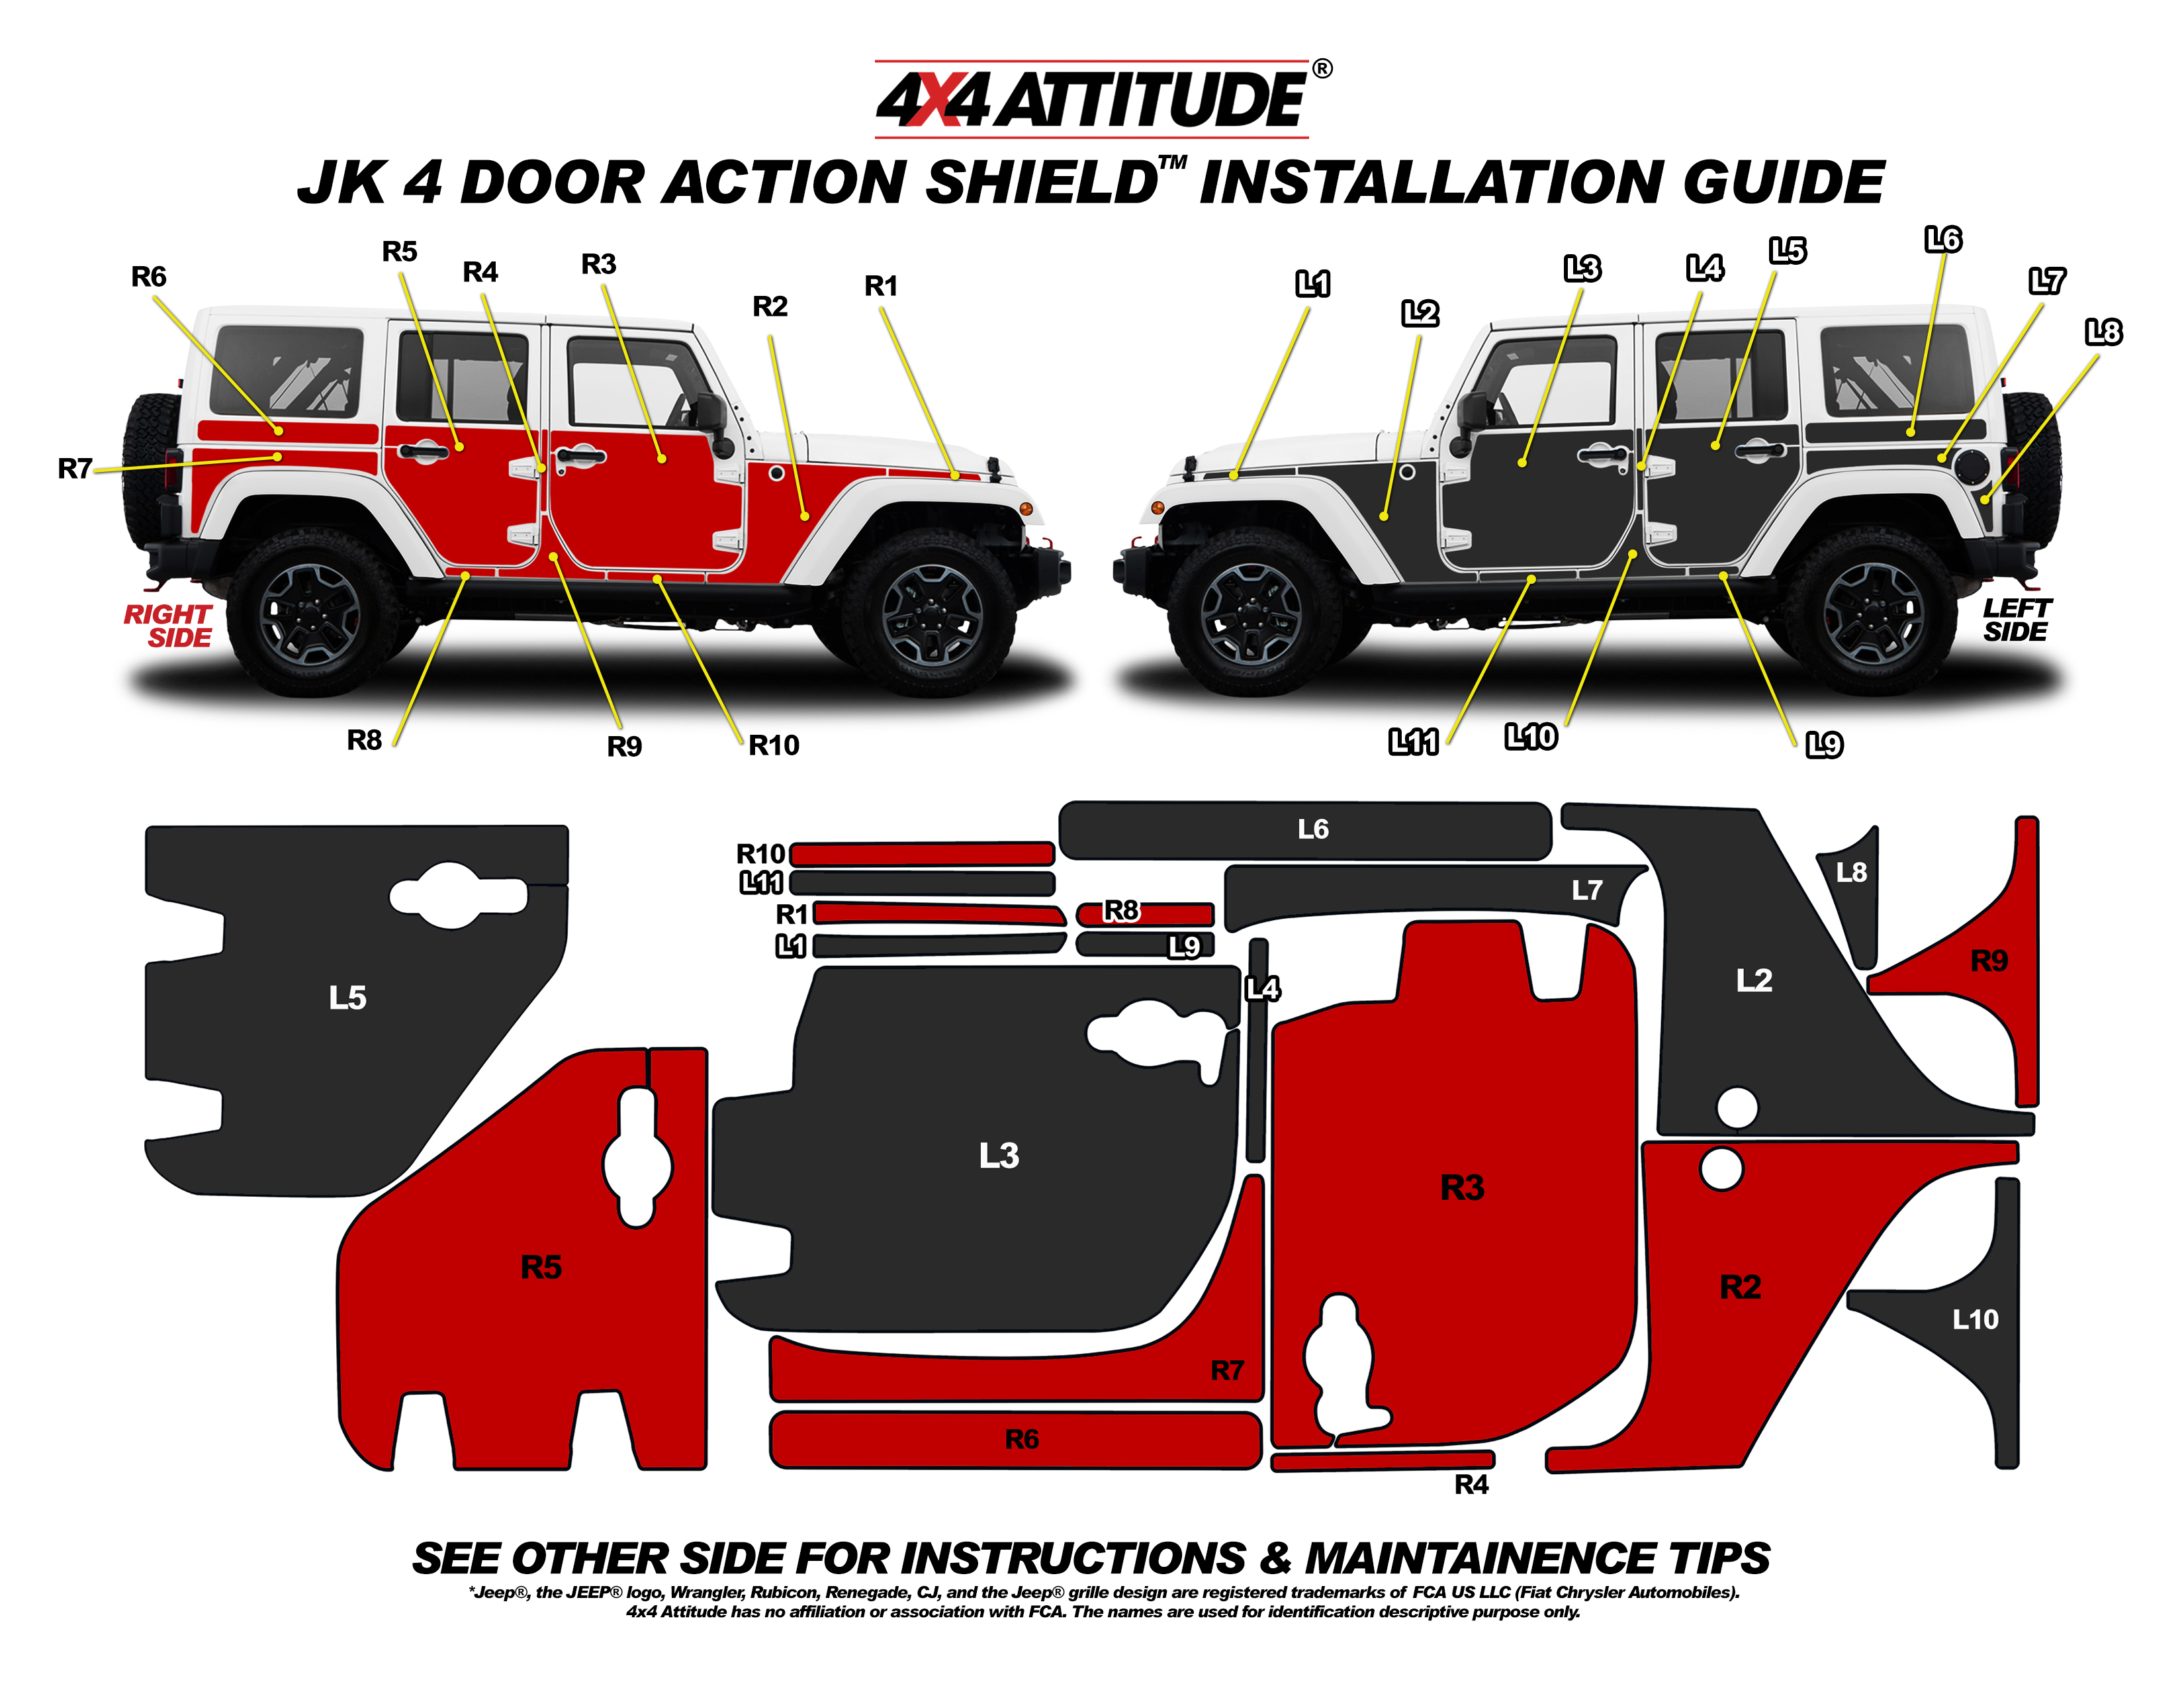
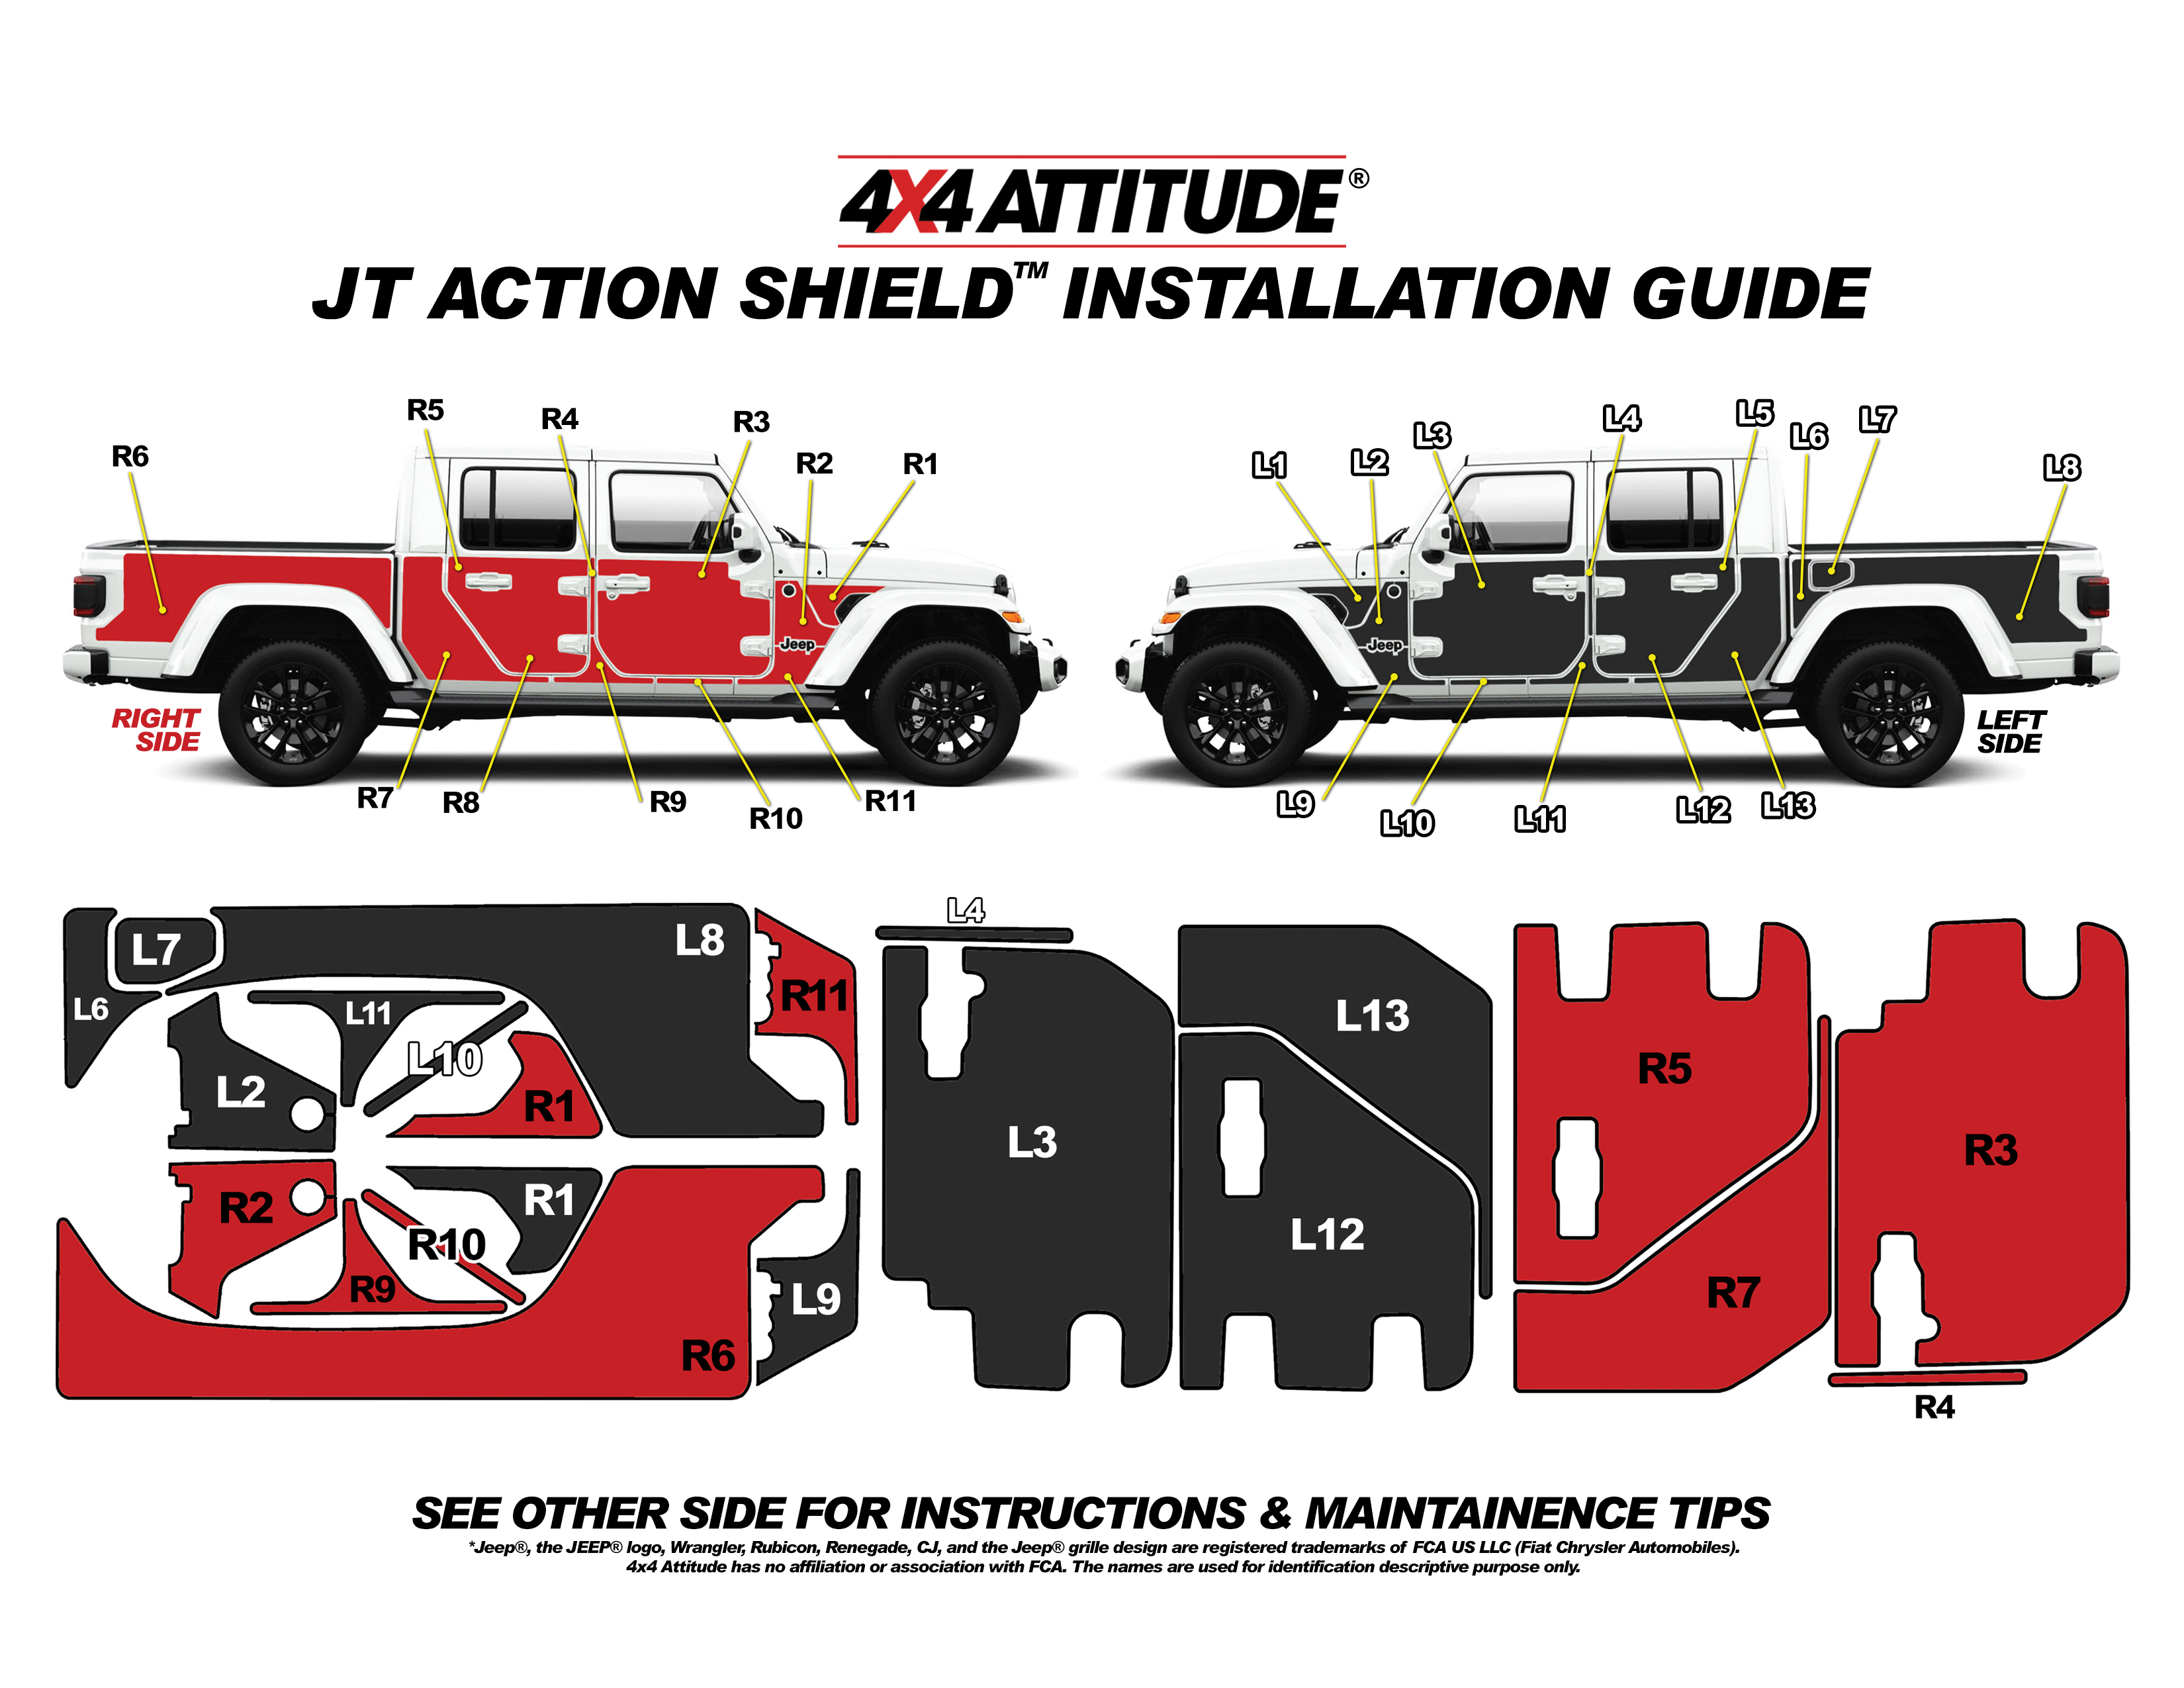
Action Shield Body Armor Diagrams

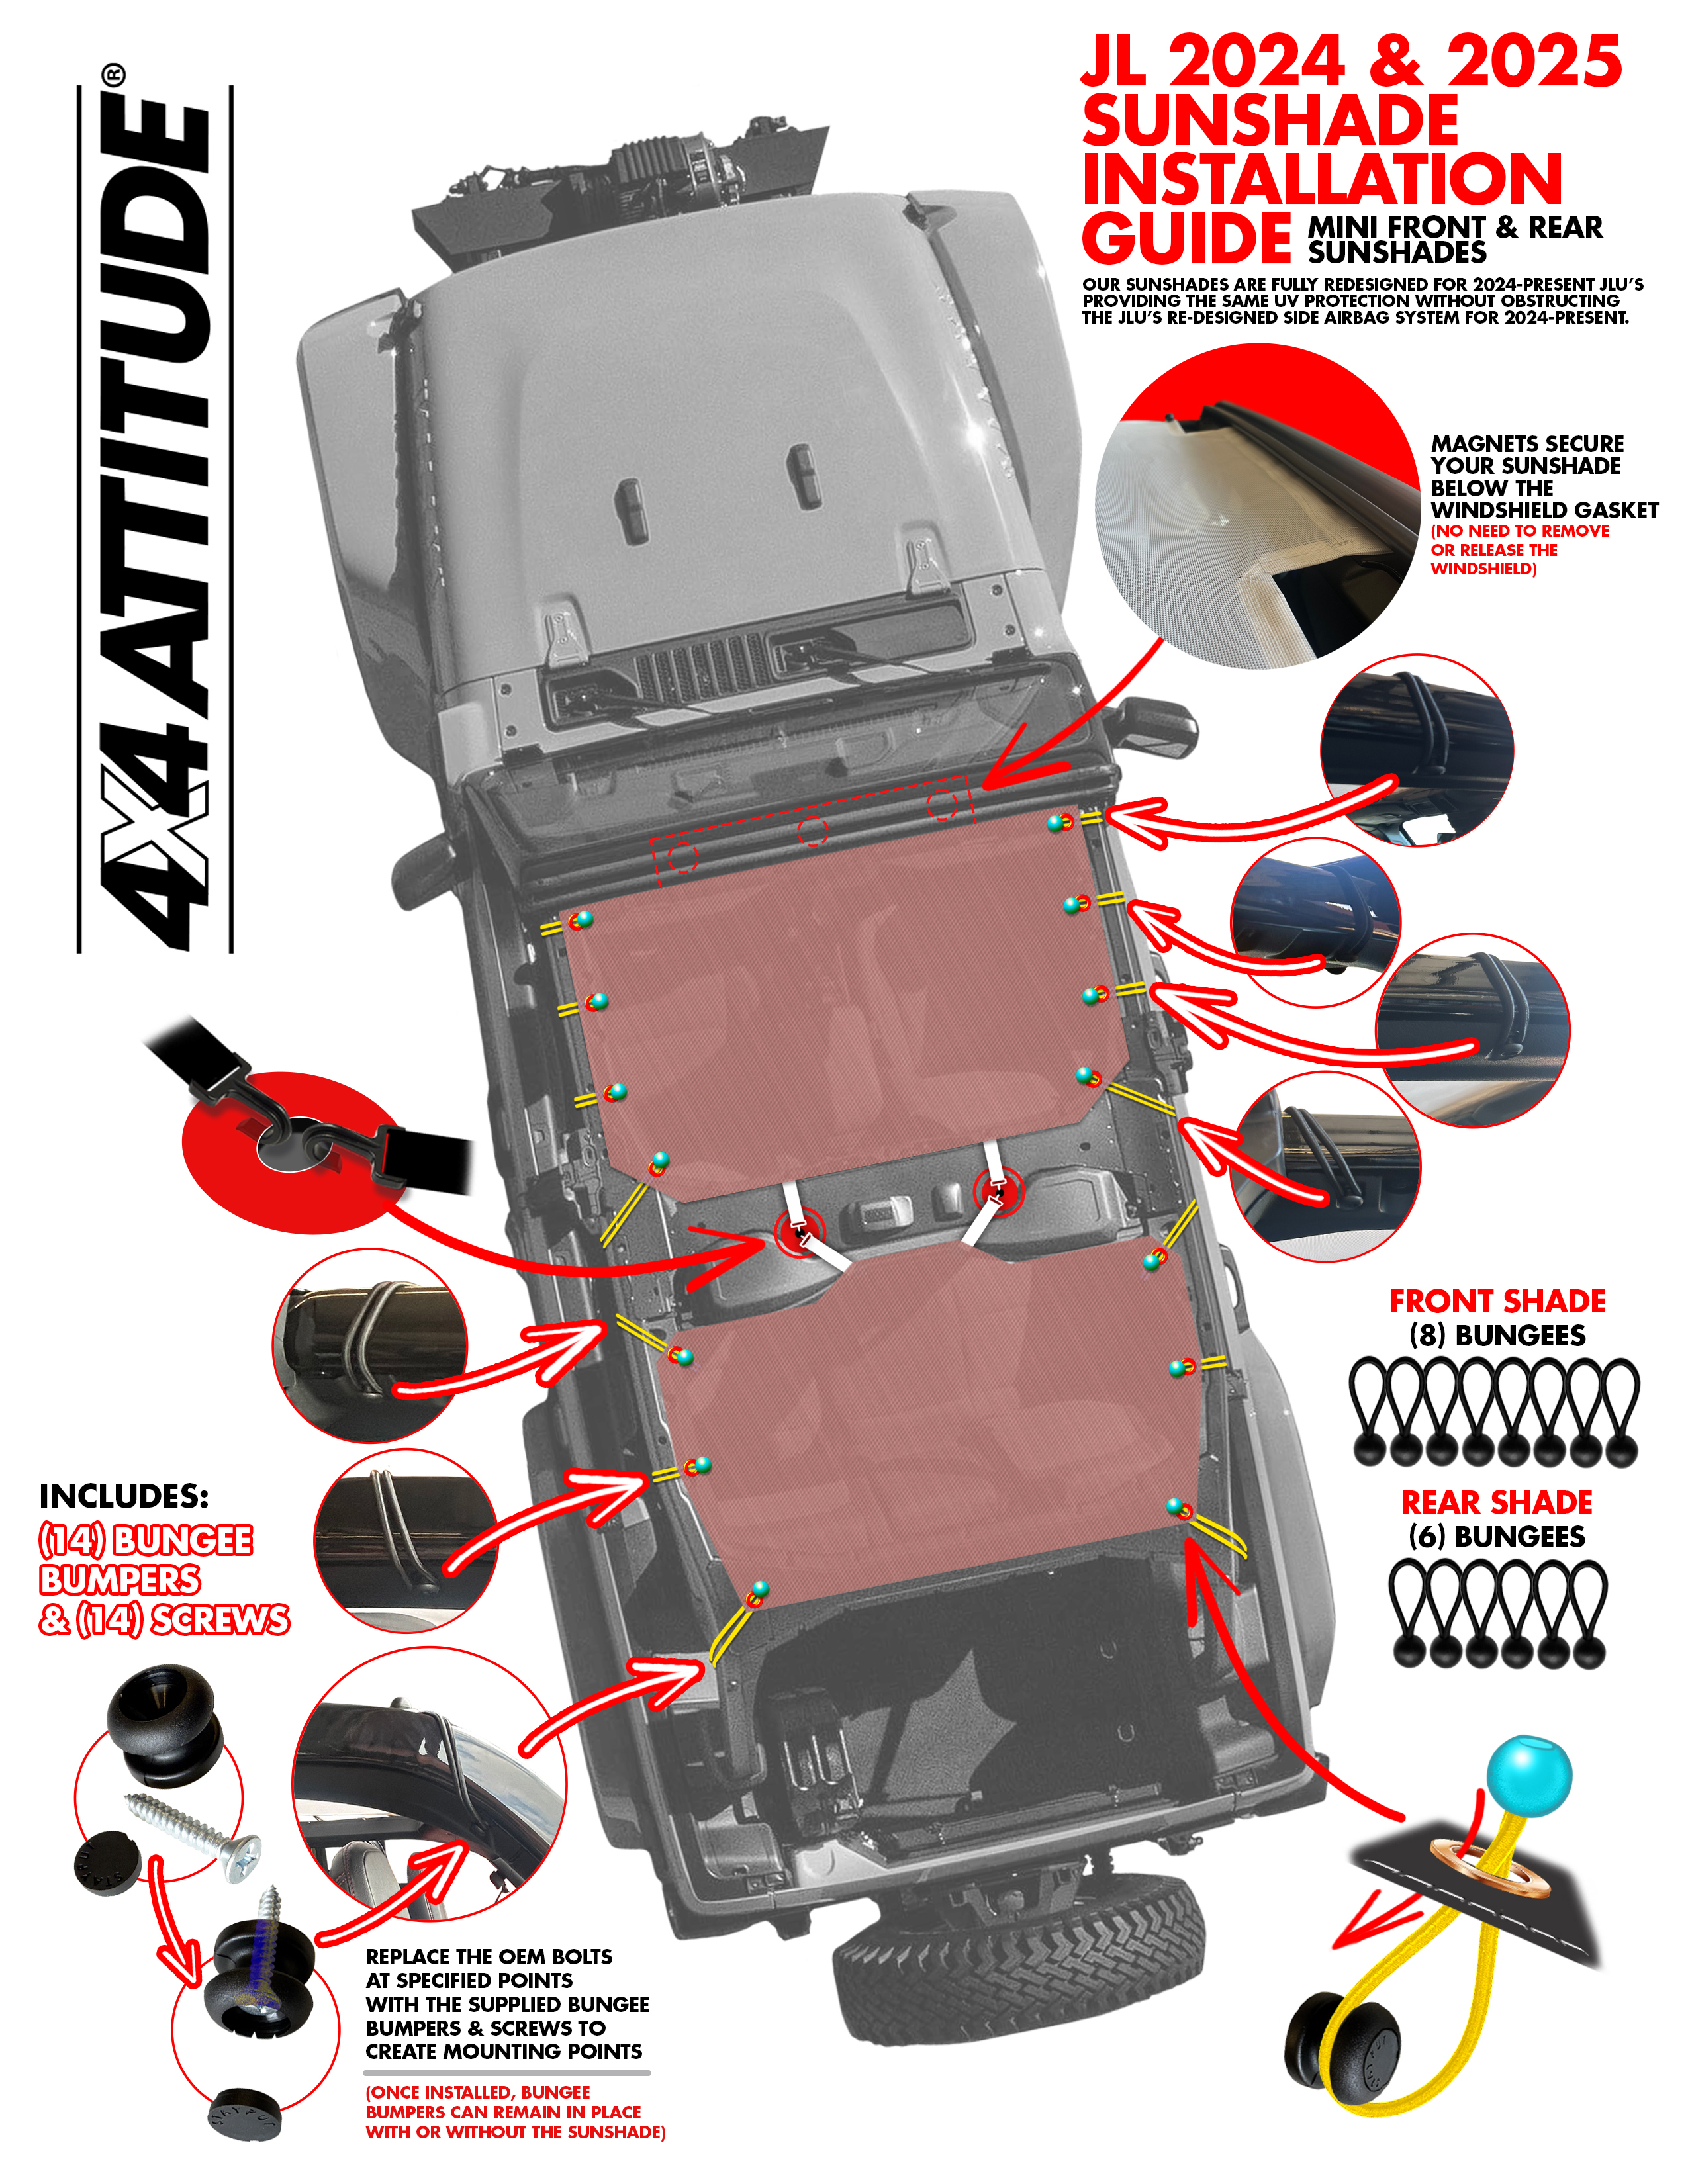
Sunshade Diagrams